What You Should Know About Robotic MIG Gun Clutches
Implementing and operating a robotic welding system requires attention to detail to gain high productivity and consistent quality. It’s equally important to do whatever you can to protect your investment for the long term — from the robot to the MIG gun and more. In some cases, robotic peripherals are an additional means to help and can provide added safety, in the case of a clutch.
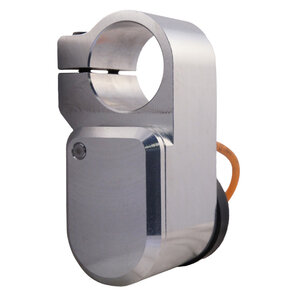
As a safety device for your robotic MIG gun, a clutch attaches to the robotic MIG gun and protects it — and the robot arm — from damage. If the robot crashes, the clutch will send a signal back to the robot that alerts it to shut down. Not only does this help prevent further damage to the robotic arm, but it also protects your gun and your front-end consumables.
While many newer robots are equipped with collision detection software that serves the same function as a clutch, older robots, which are still very commonly used, are not. Regardless of whether you’re operating a new or older robot, everyone knows your robotic welding system is only as good as the uptime it offers. It’s essential to keep as much arc-on time as possible.
When selecting a clutch, you need to choose one that can hold whatever load is going to be on it. For example, if the front end of the gun is extremely heavy and requires significant air movement, some clutches may not be able to support it or may require an adjustment to their sensitivity settings.
Also, look for obvious size constraints and make sure the clutch fits within your molding application and tooling.
When setting up your clutch be sure to check your tool center point (TCP). Putting on a clutch should not significantly change the TCP. If it’s off, be sure to validate that the clutch is in its home position. Also, when replacing a clutch, make sure the TCP is within specifications. Similarly, always reset the clutch to its home position and recheck the tool center point after a crash.
If the tool center point is off, look first to make sure no other damage occurred to another component during the crash. It could indicate that the neck bent out of position, for example, and needs to be straightened with a neck checking fixture or replaced. If all components are undamaged and the deflection is still off, you’ll need to trip the clutch again by pulling it back and snapping it back into place.
Typically, the only reason a clutch will fail is if its electrical switch inside fails. If that happens, it will no longer send a signal back to the robot, which will shut down the entire system.
In order to ensure the switch is working properly, you can either conduct a continuity check in the open and closed position of the switch using a multimeter or manually trip it by bumping the neck with your hand. If the clutch is working properly, it will send a signal back to the robot that indicates there is a problem.
This type of check can be done as part of your preventative maintenance whenever the robot is set up and in a stopped position.
Remember, as with any part of the robotic welding system, knowledge is key. Peripherals like clutches serve a distinct purpose in helping make robotic welding successful. Keep in mind some of these tips to help you get the most out of this equipment.