How To Install the QUICK LOAD Liner in the AutoLength System
- Remove consumables (nozzle, contact tip and retaining head).
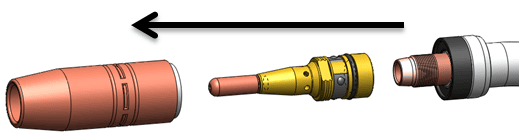
- Pull existing QUICK LOAD® Liner from the neck using pliers.
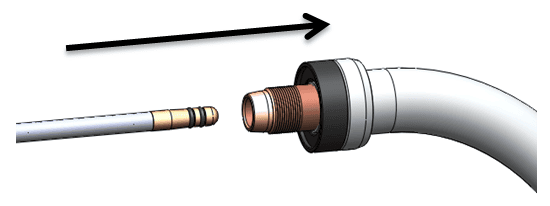
- Remove the protective cap from the new QUICK LOAD Liner.
- Insert the new QUICK LOAD Liner through the neck. Push the liner in using short strokes to prevent the liner from kinking.
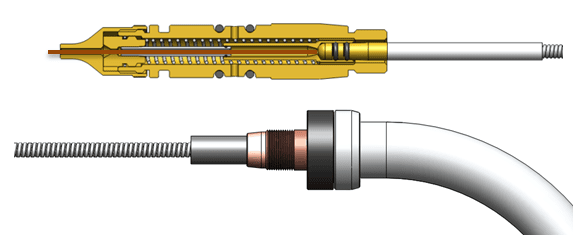
- Feed the liner into the torch until it engages with the retainer inside the AutoLength™ Pin.
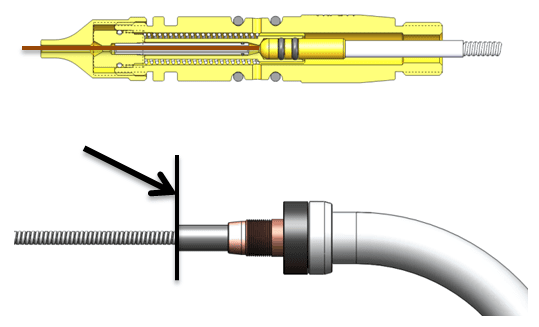
IMPORTANT! Place the liner gauge onto the end of the QUICK LOAD Liner and press flush with the end of the neck. Push the liner back into the neck and use the gauge provided to pinch and hold it in place. Trim the liner as follows:
- For 6-ft liner lengths and shorter: Trim with a 1/2″ (13 mm) stick out (BLUE liner gauge provided)
- For liner lengths longer than 6 feet: Trim with a 3/4″ (20 mm) stick out (BLACK liner gauge provided)
- IMPORTANT: After trimming, the liner will stick out of the neck by approximately 1 1/2″ (for <6-ft liner lengths) or 1 3/4″ (for >6-ft liner lengths). This is normal, as the liner will be pushed into the neck when the consumables are installed.
- Feed wire through the torch.
- Reinstall consumables.
IMPORTANT NOTE:
Liners trimmed too long or too short can cause serious wire feeding problems. Be sure to use your liner gauge as instructed to trim the liner to the correct stick out.
INS088 REV 11/12