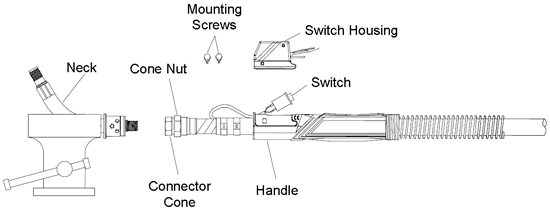
How to Install or Replace a Fixed Neck on a Straight Handle MIG Gun
Step 1
Place neck in vise.
Remove both switch housing mount screws.
Slide handle back, exposing the cable connection.
Loosen the cable / neck connection using a 7/8″ wrench.
Remove from vise and unthread neck by hand.
NOTE: The body is now an integral part of the neck and the handle mounting holes are metric (M5). Use the screws supplied with the new neck to avoid stripping of threads. Old style 407 bodies used Imperial (U.S.) threads.
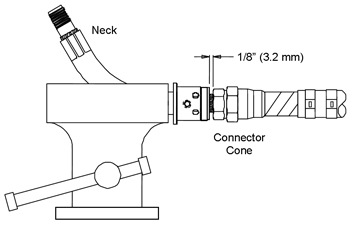
Step 2
Thread the neck into the cable connection (hand tighten).
Place neck in vise and tighten with a wrench to within 1/8″ (3.2 mm) spacing between the cable connection and neck body.
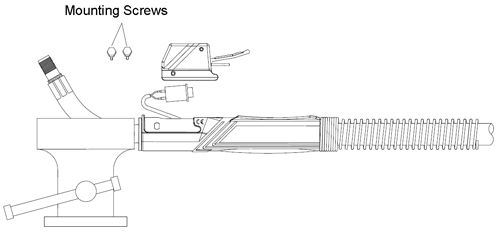
Step 3
Install the switch and reposition handle and switch housing.